Step-by-Step Guide to Using WordPress Gutenberg Editor
Unlocking Word Press Magic: A Comprehensive Guide to Mastering the Gutenberg Editor
Hey there, fellow content creators! Ever feel like wrangling your Word Press site is more of a wrestling match than a seamless experience? You're not alone. For years, the classic editor reigned supreme, but then came Gutenberg – Word Press's block-based editor – and suddenly, things felt... different. Maybe even a little intimidating. Think of it like switching from a trusty old flip phone to the latest smartphone. Sure, the flip phone was familiar, but the smartphone unlocks a whole new world of possibilities (and potential for confusion!).
I remember the first time I encountered Gutenberg. I stared blankly at the screen, wondering where all the familiar buttons had gone. It felt like someone had rearranged my desk in the middle of the night. The promise of drag-and-drop simplicity felt distant and elusive. "Blocks," "Reusable Blocks," "Editor Styles" – the jargon alone was enough to make my head spin. Did I accidentally wander into a developer convention?
But here's the thing: beneath the initial learning curve lies a powerful, intuitive tool that can truly revolutionize how you create content. Gutenberg isn't just a replacement for the classic editor; it's a fundamental shift in how Word Press approaches content creation. It's about empowering you to build visually stunning, engaging pages without needing to be a coding whiz. Think of it as having a virtual design assistant right at your fingertips.
The problem is, many of us haven't had the time or resources to truly master Gutenberg. We're still relying on old habits, wrestling with clunky workarounds, or even clinging to the classic editor like a life raft. And that's understandable! Change can be scary. But imagine being able to effortlessly create landing pages that convert like crazy, blog posts that captivate your audience, and websites that truly reflect your brand – all without needing to hire a developer or learn complex coding languages.
This guide is your passport to Gutenberg mastery. We're going to break down the editor into manageable pieces, explore its hidden features, and provide practical tips and tricks that you can use to create amazing content. We'll ditch the jargon, avoid the techy mumbo jumbo, and focus on real-world examples that you can apply to your own projects. We’ll explore how to use various blocks and customize them to your heart's content. We will delve into reusable blocks, editor styles, and even touch upon some more advanced features like creating your custom blocks. This guide is designed to be your one-stop shop for all things Gutenberg.
Whether you're a seasoned Word Press veteran or a complete newbie, this guide is for you. We're going to take you from Gutenberg novice to Gutenberg guru, one block at a time. Ready to unlock the true potential of Word Press? Let's dive in!
Step-by-Step Guide to Using Word Press Gutenberg Editor
Getting Started with Gutenberg
Okay, friends, let's get our hands dirty! We're going to start with the absolute basics: accessing the Gutenberg editor and understanding its fundamental layout. It's like learning the alphabet before writing a novel – essential stuff!
• Accessing the Gutenberg Editor: This sounds simple, but it's worth covering. When you create a new post or page in Word Press, you should automatically be greeted by the Gutenberg editor. If you're still seeing the classic editor, don't panic! You likely have the Classic Editor plugin installed. Deactivate it (Plugins > Installed Plugins) to unleash Gutenberg. Conversely, some plugins can disable Gutenberg. Check your plugin settings if you're having trouble activating it. In Word Press 5.0 and later, Gutenberg is the default editor. Older versions may require you to update Word Press itself.
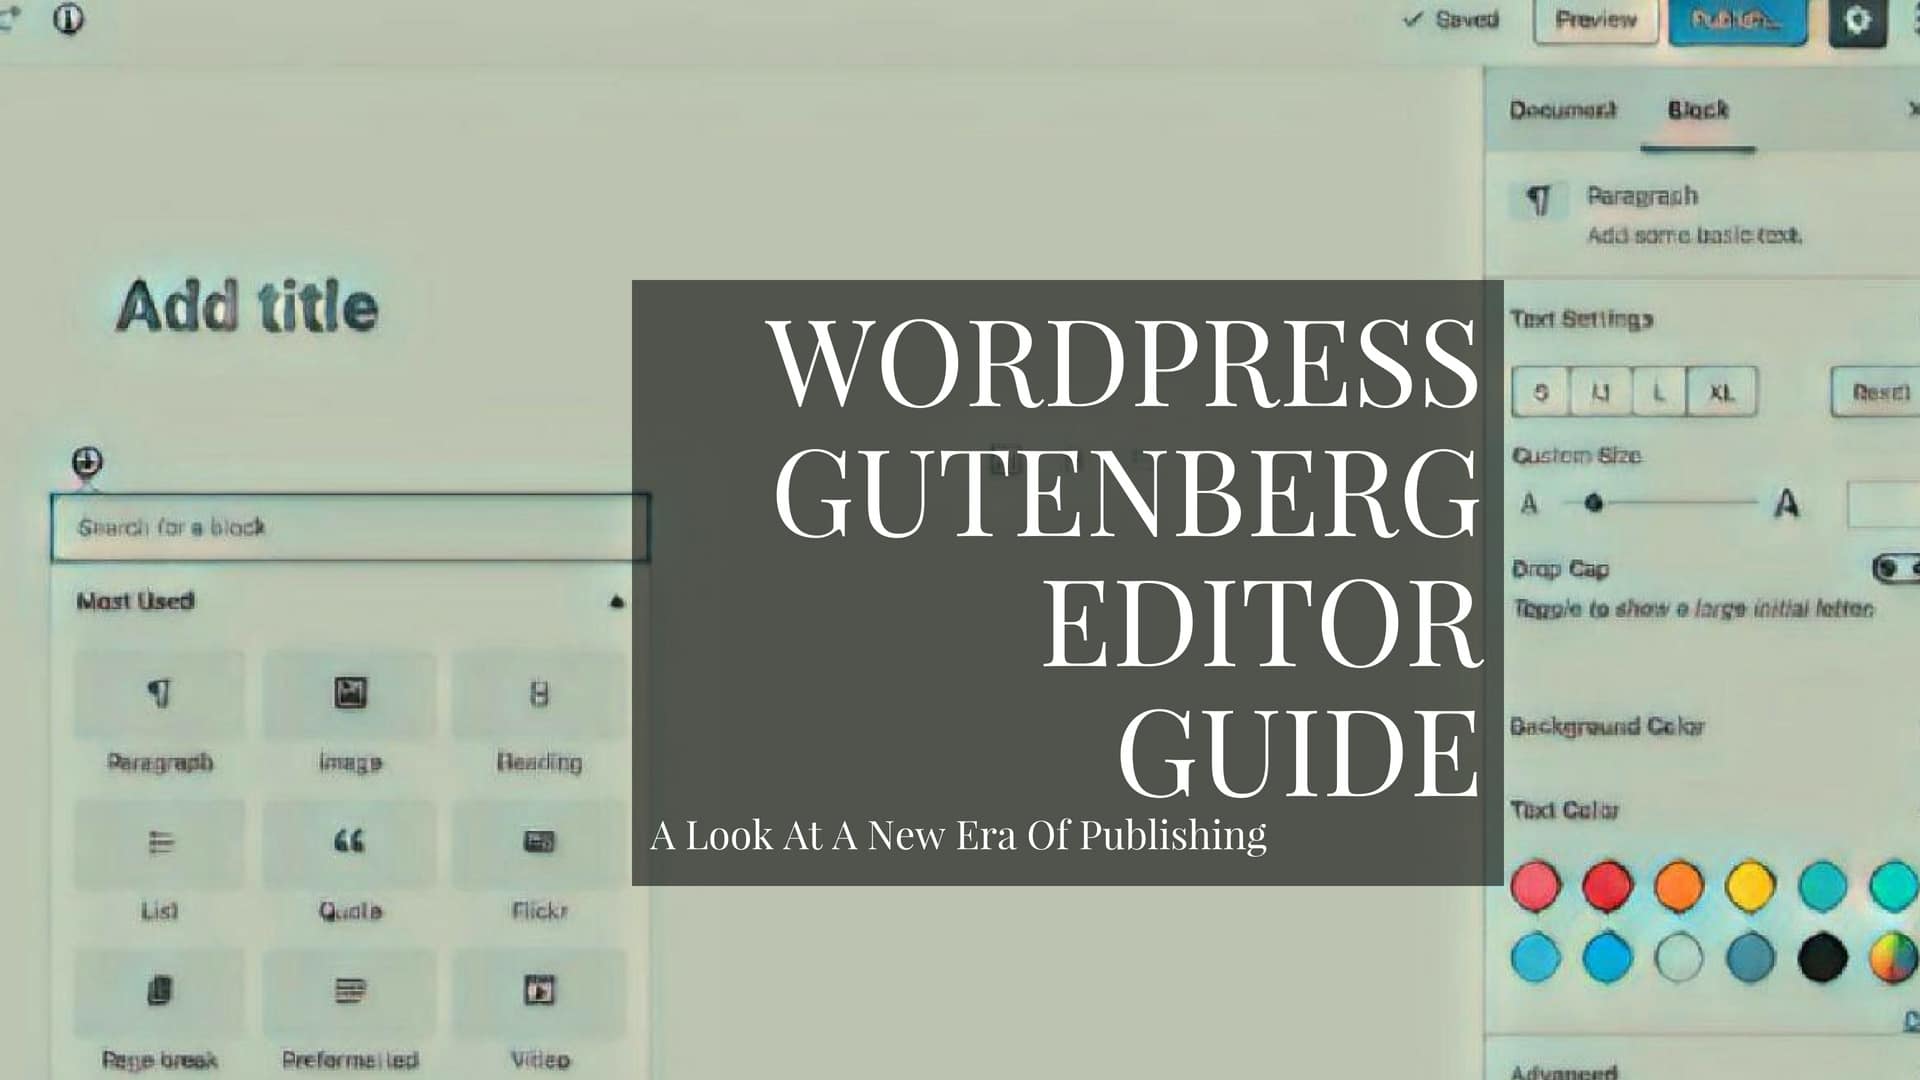
• The Gutenberg Interface: A Quick Tour: The Gutenberg interface is designed to be clean and intuitive. At the very top, you'll find the toolbar with options like adding blocks, undo/redo, save draft, preview, and publish. The main area is where you'll build your content using blocks. On the right-hand side, you'll find the settings sidebar. This is where you can customize individual blocks and adjust overall document settings. Think of the toolbar as your command center, the main area as your canvas, and the sidebar as your toolbox. Learn to navigate these three areas, and you're already halfway there.
• Adding Your First Block: The "+" Button: The "+" button (usually located at the top left or within the content area) is your best friend. Clicking it reveals the block library, where you can choose from a wide range of pre-built blocks, from simple paragraphs and headings to more complex elements like images, galleries, and videos. You can also search for specific blocks by typing in the search bar. Practice adding a few different blocks – a paragraph, a heading, and maybe an image – to get a feel for how it works. Don't be afraid to experiment! You can always delete blocks later if you don't like them.
Mastering the Core Blocks
Now that we know how to access the editor and add blocks, let's dive into some of the most commonly used core blocks. These are the building blocks (pun intended!) of most Word Press pages and posts. We’ll explore how to customize them and use them effectively. Remember, practice makes perfect! The more you experiment with these blocks, the more comfortable you'll become.
• The Paragraph Block: Your Text's Best Friend: The paragraph block is the workhorse of the Gutenberg editor. It's where you'll write the majority of your text. The toolbar above the paragraph block allows you to format your text – bold, italics, links, etc. – just like you would in a traditional word processor. You can also change the text alignment (left, center, right, or justify) and add inline images or code snippets. Experiment with different formatting options to see what works best for your content. Don't underestimate the power of well-formatted text! Good readability is key to keeping your audience engaged.
• The Heading Block: Structuring Your Content: Headings are crucial for organizing your content and improving readability. The heading block allows you to create headings of different levels (H1 to H6). H1 is typically reserved for the main title of your page or post, while H2, H3, and so on are used for subheadings. Using headings effectively not only makes your content easier to read but also helps search engines understand the structure of your page, which can improve your SEO. Think of headings as signposts that guide your readers through your content.
• The Image Block: Visual Appeal is Key: The image block allows you to easily add images to your content. You can upload images from your computer, select them from your media library, or insert them from a URL. Once you've added an image, you can customize its size, alignment, and add a caption. You can also add a link to the image, making it clickable. Remember to optimize your images for web use to ensure they load quickly. Large, unoptimized images can slow down your website and frustrate your visitors. Consider using tools like Tiny PNG to compress your images without sacrificing quality.
• The List Block: Organizing Information: Need to present information in a clear, concise way? The list block is your go-to. You can create both ordered (numbered) and unordered (bulleted) lists. The list block toolbar allows you to easily add, remove, and reorder list items. Lists are great for breaking up large blocks of text and highlighting key points.
• The Quote Block: Emphasize Important Statements: The quote block allows you to highlight important statements or quotes from external sources. You can add a quote and an optional citation. Using quotes effectively can add credibility to your content and make it more engaging. Consider using quotes to break up large blocks of text or to emphasize a key point.
Advanced Gutenberg Techniques
Alright, friends, now we're going to crank things up a notch! We're moving beyond the basics and exploring some of the more advanced features of Gutenberg. These techniques will help you create truly professional-looking and engaging content.
• Reusable Blocks: Save Time and Maintain Consistency: Reusable blocks are a game-changer. They allow you to save blocks that you use frequently and reuse them across your website. For example, you might create a reusable block for your call to action, your author bio, or your social media links. When you update a reusable block, the changes are automatically reflected everywhere it's used. This saves you a ton of time and ensures consistency across your website. To create a reusable block, select the block you want to save, click the three dots in the toolbar, and choose "Add to Reusable blocks." Give your block a name, and you're good to go!
• Columns Block: Creating Layouts: The columns block allows you to create multi-column layouts. This is great for creating visually interesting pages or for presenting information side-by-side. You can choose from a variety of pre-designed column layouts or customize the column widths to your liking. Experiment with different column layouts to see what works best for your content. Remember to consider responsiveness when creating column layouts. Make sure your content looks good on all devices, from desktops to smartphones.
• Cover Block: Make a Visual Statement: The cover block allows you to create a full-width image or video with text overlaid on top. This is perfect for creating eye-catching headers or section introductions. You can customize the background color, image opacity, and text color to create a visually stunning effect. Use high-quality images or videos to make a lasting impression.
• Embedding Content: Bring in External Media: Gutenberg makes it easy to embed content from other websites, such as You Tube videos, tweets, and social media posts. Simply paste the URL into the editor, and Gutenberg will automatically embed the content. This is a great way to add variety to your content and engage your audience.
• Custom CSS: Take Control of Styling: For those who are comfortable with CSS, Gutenberg allows you to add custom CSS to individual blocks or to the entire page. This gives you complete control over the styling of your content. To add custom CSS to a block, select the block, click the "Advanced" tab in the settings sidebar, and enter your CSS code in the "Additional CSS class(es)" field. You can then target this class in your theme's CSS file or in the Word Press customizer. Be careful when adding custom CSS, as incorrect code can break your website. Always test your code thoroughly before publishing it.
Troubleshooting Common Gutenberg Issues
Even with the best guides, sometimes things go wrong. Let's tackle some common Gutenberg issues and how to fix them. Because let's face it, technology isn't always sunshine and rainbows!
• Gutenberg Isn't Loading: If Gutenberg isn't loading, the first thing to check is whether you have the Classic Editor plugin installed. If so, deactivate it. Also, make sure your Word Press installation is up to date. An outdated version of Word Press may not be compatible with Gutenberg. Clear your browser cache and cookies, as this can sometimes resolve loading issues. Finally, check your browser's developer console for any Java Script errors, which could indicate a plugin conflict.
• Blocks Are Not Displaying Correctly: If your blocks aren't displaying correctly, the first thing to check is your theme. Some themes may not be fully compatible with Gutenberg. Try switching to a default Word Press theme (like Twenty Twenty-Three) to see if the issue is with your theme. If the issue is with your theme, contact the theme developer for support. Also, check your custom CSS for any errors that might be affecting the display of your blocks.
• The Editor is Slow: A slow editor can be frustrating. Try deactivating any plugins that you're not using, as they can sometimes slow down the editor. Also, make sure your website is hosted on a fast server. A slow server can significantly impact the performance of the editor. Optimize your images for web use to reduce their file size. Large, unoptimized images can slow down the editor.
• Cannot Add or Edit Blocks: If you're unable to add or edit blocks, make sure you have the necessary permissions. In Word Press, users with the "Editor" or "Administrator" role should be able to add and edit blocks. If you're using a user role management plugin, check the settings to ensure that your user role has the necessary permissions. Also, check for any plugin conflicts that might be preventing you from adding or editing blocks.
• Reverting to the Classic Editor: If you're still not a fan of Gutenberg, you can revert to the classic editor by installing the Classic Editor plugin. This plugin will disable Gutenberg and restore the classic editor interface. However, keep in mind that the classic editor is no longer actively developed, so you may miss out on new features and improvements. I encourage you to give Gutenberg a fair chance – it's a powerful tool that can significantly improve your content creation workflow.
Gutenberg and SEO: A Winning Combination
Creating beautiful content is great, but if nobody sees it, what's the point? Let's talk about how to use Gutenberg to boost your SEO (Search Engine Optimization). SEO is all about making your website more visible to search engines like Google. And Gutenberg can be a valuable asset in your SEO strategy.
• Heading Tags: Use Them Wisely: As we discussed earlier, heading tags (H1 to H6) are crucial for structuring your content. But they're also important for SEO. Search engines use heading tags to understand the topic of your page or post. Use heading tags to break up your content into logical sections and to highlight key keywords. Remember to use only one H1 tag per page – this should be the main title of your content. Use H2, H3, and so on for subheadings.
• Image Optimization: Alt Text is Your Friend: Images can make your content more engaging, but they can also impact your SEO. When you add an image to your content, be sure to add alt text. Alt text is a short description of the image that search engines use to understand what the image is about. Use descriptive alt text that includes relevant keywords. Also, optimize your images for web use to reduce their file size. Large, unoptimized images can slow down your website and hurt your SEO.
• Internal Linking: Connect Your Content: Internal linking is the practice of linking to other pages or posts on your website. This helps search engines understand the relationship between your content and can improve your SEO. When you create new content, look for opportunities to link to relevant pages or posts on your website.
• Mobile-Friendly Design: Essential for SEO: Google prioritizes mobile-friendly websites in its search results. Make sure your website is responsive, meaning that it looks good on all devices, from desktops to smartphones. Use Gutenberg's column block and other layout options to create mobile-friendly designs. Test your website on different devices to ensure that it looks good everywhere.
• Content is King: Create High-Quality Content: Ultimately, the best way to improve your SEO is to create high-quality content that your audience will love. Write engaging, informative content that provides value to your readers. Use keywords naturally throughout your content, but don't stuff keywords into your content just for the sake of SEO. Focus on creating great content first, and the SEO will follow.
Frequently Asked Questions about Gutenberg
Let's address some common questions about using the Gutenberg editor. Hopefully, this section will clear up any lingering doubts or concerns you might have!
• Question: Is Gutenberg better than the classic editor?
Answer: "Better" is subjective and depends on your needs. Gutenberg offers a more visual and flexible content creation experience, while the classic editor is simpler and more familiar. Gutenberg's block-based approach allows for more complex layouts and designs without coding. The classic editor is faster and easier for simple text-based content. Gutenberg can be more overwhelming for beginners. Ultimately, the best editor is the one that you're most comfortable using and that best suits your workflow.
• Question: Do I need to learn to code to use Gutenberg effectively?
Answer: No, you don't need to learn to code to use Gutenberg effectively. Gutenberg is designed to be a visual editor that allows you to create complex layouts without writing any code. However, knowledge of HTML and CSS can be helpful for customizing the appearance of your blocks and creating more advanced designs. Gutenberg also offers a custom HTML block that you can use to add custom code to your content.
• Question: Will Gutenberg slow down my website?
Answer: Gutenberg itself should not significantly slow down your website. However, using too many large images or poorly optimized blocks can impact your website's performance. Optimize your images for web use and use blocks efficiently to minimize the impact on your website's speed. Also, make sure your website is hosted on a fast server.
• Question: Can I use plugins with Gutenberg?
Answer: Yes, you can use plugins with Gutenberg. Many Word Press plugins are designed to be compatible with Gutenberg. Some plugins add new blocks to the Gutenberg editor, while others enhance the functionality of existing blocks. However, be careful when installing plugins, as too many plugins can slow down your website and cause conflicts.
We've covered a lot of ground, friends! From the basics of accessing the Gutenberg editor to advanced techniques like creating reusable blocks and optimizing your content for SEO, you now have the knowledge and skills to create amazing content with Word Press. Remember, the key to mastering Gutenberg is practice. Don't be afraid to experiment with different blocks, try out new layouts, and push the boundaries of what's possible.
Now, it's time to put your newfound knowledge into action! Head over to your Word Press website and create a new post or page using the Gutenberg editor. Experiment with different blocks, try out some of the advanced techniques we discussed, and see what you can create. Share your creations with the world and let us know what you think. What are your favorite Gutenberg blocks? What challenges did you encounter? What tips and tricks did you discover? We'd love to hear from you!
With consistent effort and a willingness to learn, you'll be a Gutenberg master in no time! So go forth, create, and inspire! Are you ready to transform your content creation process and unleash the full potential of your Word Press website?
Post a Comment for "Step-by-Step Guide to Using WordPress Gutenberg Editor"
Post a Comment