Caramel Apple Icebox Cake Revives a Classic Treat
A Unique Take on a Classic Dessert: No-Bake Caramel Apple Icebox Cake
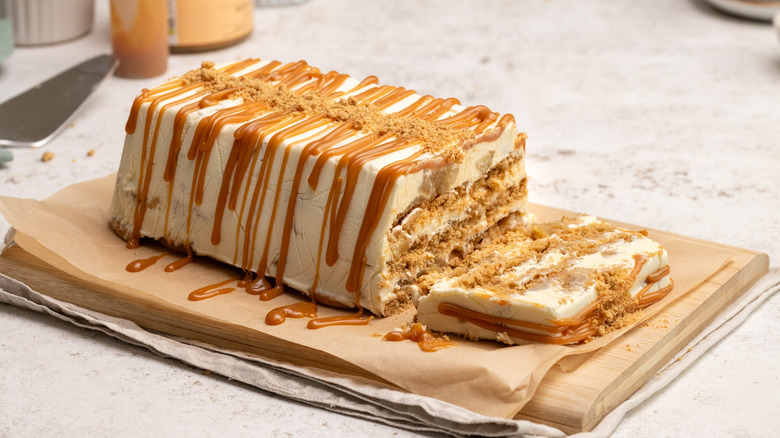
Cakes come in countless varieties, each tailored for different occasions and tastes. From the traditional birthday cake to more refined options, there's something for everyone. Among these, the icebox cake stands out as a unique dessert that doesn't require baking. Instead, it relies on refrigeration to create a cool and creamy treat. This no-bake caramel apple icebox cake is a perfect example of how creativity can bring a fresh twist to an old favorite.
The recipe, developed by Jennine Rye, offers a delightful alternative for those who want a cake-like experience without turning on the oven. It features spiced apples, sweet cream cheese, rich caramel sauce, and crunchy cookies, all layered together and chilled to perfection. The result is a sophisticated yet familiar dessert that’s ideal for warm days.
Gathering the Ingredients
To start, gather the necessary ingredients. For the apple layer, you’ll need apples (preferably cooking varieties like Granny Smith or Bramley), butter, brown sugar, ground cinnamon, and mixed spice or pumpkin pie spice. For the cream layer, heavy cream, cream cheese, granulated sugar, and vanilla extract are essential. Additionally, you'll need caramel sauce and digestive biscuits to complete the layers.
Step-by-Step Instructions
- Prepare the Apples: Peel, core, and dice the apples.
- Heat the Pan: Add butter to a large pan over medium heat.
- Add Apples and Spices: Place the diced apples in the pan with brown sugar, cinnamon, and mixed spices.
- Cook the Apples: Cook for 5–10 minutes until tender, adding water if needed.
- Cool the Apples: Remove from heat and let them cool.
- Make the Cream Cheese Mixture: In a stand mixer, combine heavy cream, cream cheese, sugar, and vanilla extract until smooth.
- Line the Loaf Pan: Use plastic wrap to line a large loaf pan.
- Layer the Cream Cheese: Spread one-third of the cream mixture at the bottom of the pan.
- Add the Apples: Top with one-third of the cooled apple mixture.
- Add Caramel and Biscuits: Drizzle one-third of the caramel sauce and add a layer of broken biscuits.
- Repeat the Layers: Continue layering until all ingredients are used.
- Refrigerate: Cover with plastic wrap and refrigerate for at least 8 hours.
- Serve: Invert the cake onto a serving dish and drizzle with additional caramel before slicing.
Customizing Your Icebox Cake
This recipe is already rich in flavor, but there are many ways to personalize it. Consider adding pears or berries for a different fruit profile, or try roasted peaches and strawberries for a summery twist. Swap digestive biscuits for gingersnaps or Biscoff cookies for added spice, or use vanilla cake slices for a softer texture. Chopped nuts like pecans or almonds can enhance both texture and flavor.
Storing Your Icebox Cake
Once assembled, store the cake in the refrigerator to allow the layers to set. The cream and fruit components need time to stabilize, and the biscuits will soften slightly. If properly wrapped or stored in an airtight container, the cake can last up to three days in the fridge. You can also freeze it for longer storage, ensuring it's well-wrapped to prevent freezer burn. Thaw it in the fridge before serving.
Additional Recipes to Try
If you enjoy this no-bake caramel apple icebox cake, you might also appreciate other desserts such as a simple spiced apple cake, a matcha strawberry icebox cake, or a no-bake eclair cake. Each offers its own unique flavors and textures, making them great additions to your collection of easy-to-make treats.
Post a Comment for "Caramel Apple Icebox Cake Revives a Classic Treat"
Post a Comment