DIY Floating Wood Deck for a Stylish Backyard Makeover
Creating a Backyard Grilling Space with a Floating Deck
Having a dedicated space in your backyard for grilling can greatly enhance your outdoor experience. Whether you have a deck, porch, or balcony, the key is to create a firm and elevated surface that allows for both cooking and relaxation. A poorly constructed area around a grill can lead to muddy spots or worn-out grass from frequent use. If you don’t already have a porch or patio, building a floating deck is an excellent option. This project requires some time and a few trips to the hardware store, but it’s a cost-effective way to create a functional and stylish space.
Benefits of a Floating Deck
Floating decks offer several advantages over traditional decks. They don’t require complex in-ground concrete piers, and they typically don’t need permits from local authorities or homeowners’ associations. This makes them an ideal choice for those looking to build a simple yet durable structure without the hassle of extensive planning.
Before starting, it's important to have a clear design in mind. The deck will be built using wooden boards secured to a frame supported by concrete blocks. For this project, you'll need stainless steel screws, 2x6-inch boards, 2x8-inch boards, a measuring tape, a shovel, five concrete deck blocks, a power drill, a circular saw, and wood stain. The amount of wood required depends on the size of your deck. For a 10-foot by 10-foot structure, you’ll need approximately nine 2x6-inch boards for the base and nine 2x8-inch boards for the top layer. While wood is the most expensive component, it remains one of the best materials for a budget-friendly deck.
Building the Frame
The most challenging part of the process is assembling the frame, which requires precision. Start by finding a flat surface, such as the floor of your garage. Take two 2x6-inch boards and align them so that the end of one overlaps the other at a 90-degree angle. Secure them together with two screws. Repeat this process with two more boards to form a square. Continue connecting the sections until you have a complete frame.
Next, determine where you want your deck to be placed. Measure the dimensions and mark the corners. Dig shallow holes and place the concrete blocks inside, ensuring they are level with each other. Position the frame on top of the blocks so that the indentations in the blocks align with the edges of the frame. To reinforce the structure, add additional 2x6-inch boards into the frame and screw them in alternating positions for added support and strength.
Adding the Floorboards
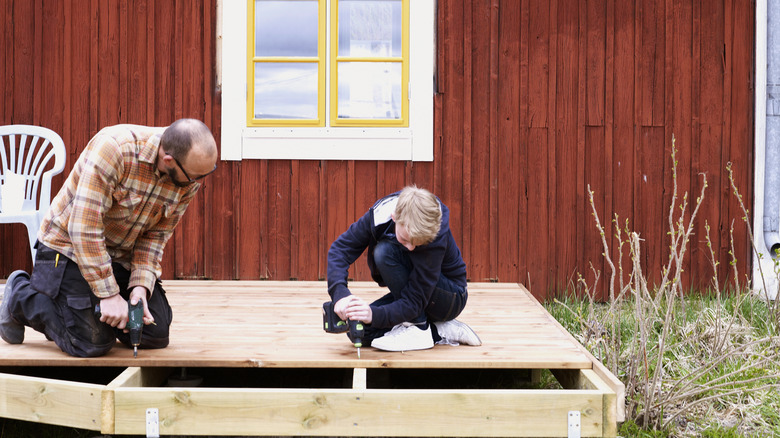
Once the frame is secure, it’s time to attach the 2x8-inch floorboards. Each board should run crosswise to the planks that make up the outer structure of the frame. If any boards extend beyond the edge of the frame, use a circular saw to cut them flush with the frame. After securing all the floorboards, apply a couple of coats of exterior wood stain to protect the structure from weather damage.
Enhancing Your Deck
After completing the basic structure, you can add extra features to make your deck more functional and stylish. Consider adding shelf space or installing a DIY wood privacy screen to give your deck a personalized touch. These additions can help create a more inviting and comfortable space for grilling and entertaining.
With a little effort and the right tools, a floating deck can transform your backyard into a perfect spot for outdoor activities. Whether you're hosting friends or enjoying a quiet evening, a well-built deck offers both practicality and aesthetic appeal.
Post a Comment for "DIY Floating Wood Deck for a Stylish Backyard Makeover"
Post a Comment